Embark on an exciting journey into the world of miniature space exploration with our comprehensive guide to building the 7-in-1 Solar Rechargeable Space Fleet! This innovative kit allows you to construct seven different space vehicles, each powered by the sun, offering hours of creative fun and learning. From a rugged space rover to a sleek lunar lander, the possibilities are endless, appealing to both seasoned model builders and curious newcomers alike. The durable, high-quality components ensure a rewarding building experience, fostering STEM learning and inspiring young minds to explore the wonders of space technology.
This guide focuses specifically on the fastest and easiest assembly of the impressive space rover, providing a streamlined approach to construction. Get ready to launch into action with our clear, step-by-step instructions, complete with helpful diagrams and images, which will lead you through the process from unpacking your kit to proudly displaying your finished solar-powered masterpiece. Let's begin building your own interplanetary explorer!
Preparation and Safety Guidelines
- Diagonal cutters
- Scissors
- AAA batteries
- Always supervise children during assembly and playtime. Small parts pose a choking hazard.
- Avoid direct sunlight exposure on the solar panel for extended periods, especially during peak sun hours. Overcharging can damage the battery.
- Never disassemble the solar panel or battery yourself. This will void the warranty and may cause damage or injury.
Step-by-Step Instructions
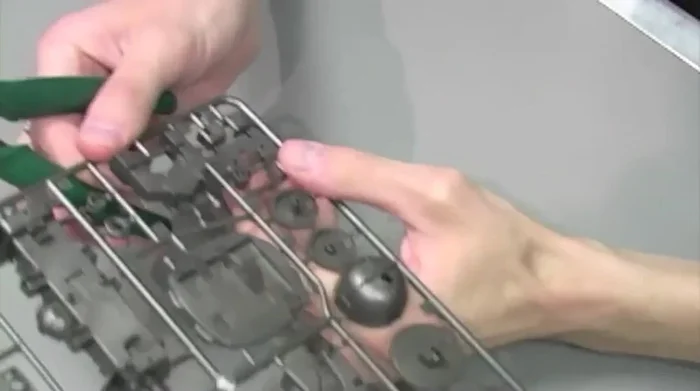
Prepare Landing Gear
- Remove parts B6 and B9, slide B9 over B16.

Prepare Landing Gear Assemble Front Wheel
- Remove two A1 parts and P14 (remove center), attach to P8 shaft.
Assemble Front Wheel Assemble Solar Module
- Attach double-sided tape to B10, insert solar panel wires, and press firmly.
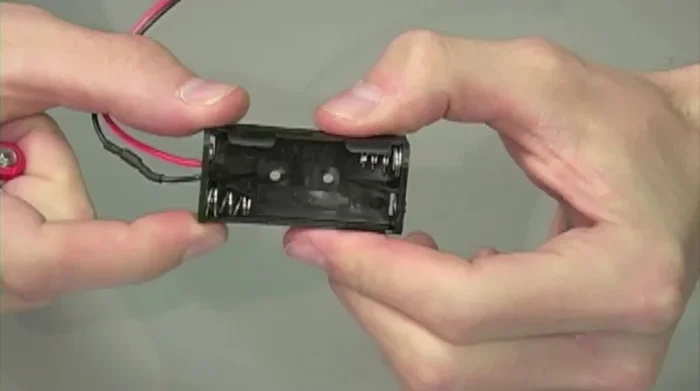
Assemble Solar Module Assemble Battery Module
- Insert AAA batteries into battery pack, insert into B7 with A7 pieces and inner wheel parts.
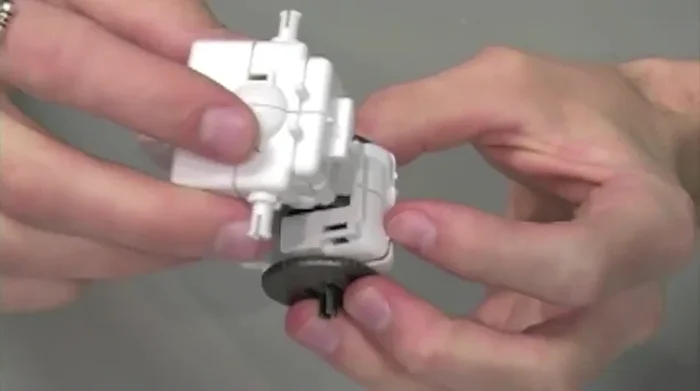
Assemble Battery Module Assemble Upper Gearbox (Part 1)
- Attach pinion gear to P9, place into A6, add motor (threading wires), shafts P6, B8, and yellow gears.
Assemble Upper Gearbox (Part 1) Complete Upper Gearbox
- Attach blue gear (P2), P4, and A2.
Complete Upper Gearbox Attach Wheels to Upper Gearbox
- Attach A10 wheels and foam.
Attach Wheels to Upper Gearbox Assemble Lower Gearbox
- Attach B15 to P7 shaft, add B12, then A8 with wheels, B14 and remaining shaft, and finally A9.
Assemble Lower Gearbox Connect Gearboxes
- Attach upper and lower gearboxes.
Connect Gearboxes Assemble Space Rover
- Attach B13 to the upper gearbox, add the front wheel to B11.
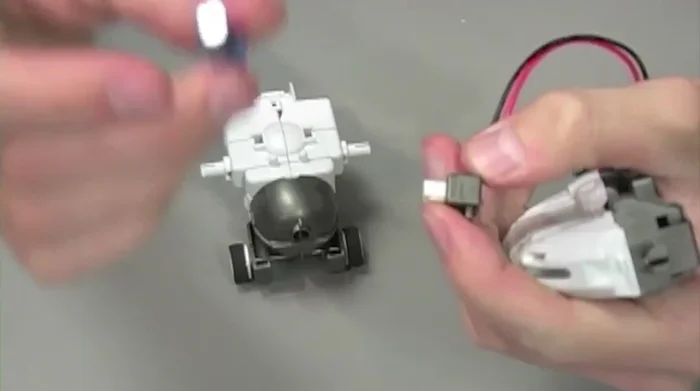
Assemble Space Rover Power the Space Rover
- Attach battery module and charge for 5 seconds.
Power the Space Rover


Read more: Harnessing Solar Power: A Green Energy Solution
Tips
- Remove all burs from parts after cutting them from the molding.
- Ensure all surfaces are smooth before assembly.